7 Steps to Remove Mold on a Window Sill (And How to Prevent It)
Mold on a window sill is more than just an unsightly nuisance. It can pose health risks, damage your windows, and indicate underlying moisture problems in your home. Fortunately, with the right approach, removing mold is simple and safe. Whether caused by condensation, high humidity, or poor ventilation, we’ll guide you through tackling the issue head-on and preventing it from returning.
Here’s what you’ll learn in this article:
- Why mold grows on window sills
- 7 Steps to safely remove mold from your window sill
- Tips to prevent mold from reappearing
🤔 Why Does Mold Grow on Window Sills?
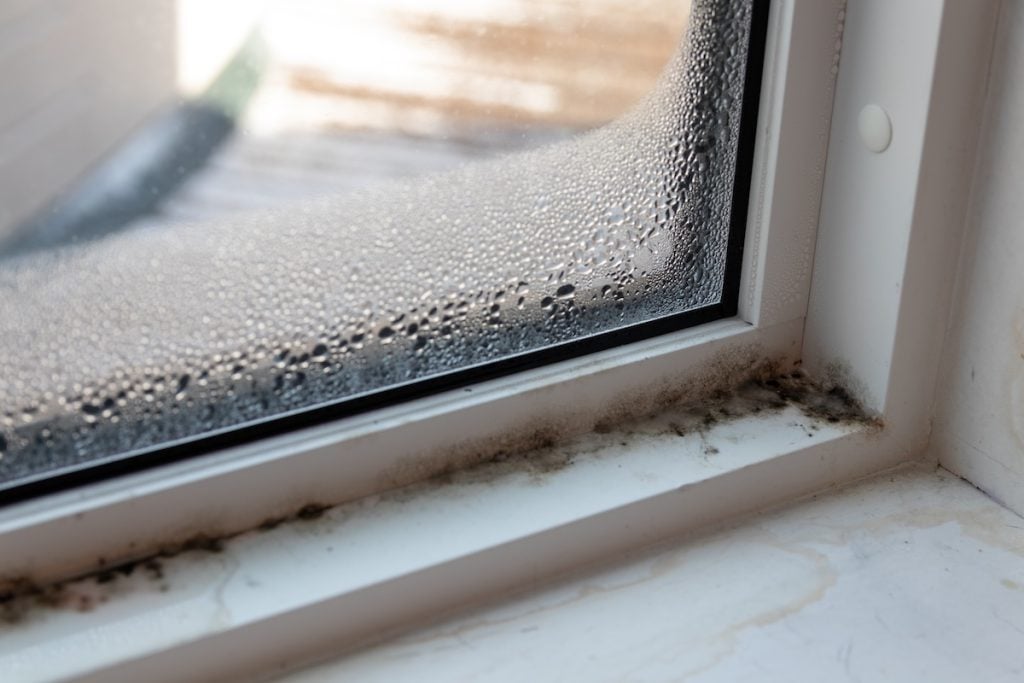
Mold thrives in damp, humid environments where moisture lingers, providing the perfect conditions for it to grow and spread. Window sills are particularly vulnerable because they often collect condensation, especially during colder months when the warm air inside your home meets the cold glass of your windows. This temperature difference causes water droplets to form, creating a damp surface ideal for mold growth. Over time, if this moisture isn’t wiped away or addressed, it can lead to stubborn mold problems. In addition, factors like poor insulation, water leaks, and lack of airflow can exacerbate the issue, making window sills a hotspot for mold. Common causes of mold on window sills include:
- Excessive condensation: Often caused by poor insulation or high humidity.
- Leaky windows: Water seepage creates a perfect environment for mold.
- Poor ventilation: Lack of airflow traps moisture near windows, encouraging mold growth.
✅ 7 Steps to Safely Remove Mold on a Window Sill
Removing mold doesn’t need to be difficult or hazardous. Follow this straightforward, step-by-step process to restore your window sills to their former condition.
1. Protect Yourself
Mold can release spores into the air that may irritate your skin, lungs, and eyes, making it crucial to prioritize your safety before beginning the cleanup process. Start by putting on a pair of protective gloves to shield your hands from direct contact with mold and cleaning chemicals. Safety goggles are essential to keep your eyes safe from any airborne spores or splashes from cleaning solutions, and a face mask will help you avoid inhaling harmful spores that could otherwise affect your respiratory system. Consider using an N95 mask for maximum protection. These precautions may seem simple, but they play a vital role in minimizing your exposure to mold and ensuring your health isn’t compromised during the cleanup process.
2. Gather Your Supplies
To effectively clean mold from your window, it’s important to gather all necessary supplies before you start. Having everything ready beforehand will save time and make the process smoother. You’ll need warm water and a cleaning agent, such as dish soap or a mild detergent, to help remove dirt and residue. For tackling the mold itself, white vinegar or hydrogen peroxide are excellent natural options known for their ability to kill mold spores effectively. A spray bottle will allow you to apply these solutions evenly to the affected area. For scrubbing, grab a sturdy scrub brush for larger surfaces and an old toothbrush for smaller, hard-to-reach spots. Don’t forget to stock up on clean rags or paper towels for wiping down the area and absorbing any excess moisture. Having these tools at hand ensures you won’t have to stop mid-cleanup to search for missing items.
3. Prepare the Area
Before diving into the cleaning process, prepare the area around the moldy window to keep things organized and prevent contamination. If there are curtains, blinds, or any other coverings on or near the window, carefully remove them to keep them from coming into contact with mold spores. Place these items in a sealed bag or wash them separately to avoid spreading any contamination. Lay down old towels, absorbent cloths, or a plastic sheet around the window sill to catch any debris or excess moisture that may drip during the cleaning process. These extra steps not only keep your workspace manageable but also ensure that the mold doesn’t spread to other parts of the room while you’re working.
4. Pre-Treat the Mold
Pre-treating the mold is a critical step in ensuring effective removal. Start by filling a spray bottle with either white vinegar or hydrogen peroxide, both of which are natural and powerful solutions for killing mold. However, never mix the two, as this can create harmful chemicals that pose a safety risk. Generously spray the moldy area, making sure every part of the mold is saturated with the solution. Let the solution sit for 15–20 minutes, as this soaking time allows it to penetrate the mold and loosen its grip on the surface. During this time, the cleaning agent works to break down the structure of the mold spores, making them easier to scrub away in the next step. This pre-treatment not only ensures a more thorough cleanup but also reduces the likelihood of mold regrowth.
5. Scrub and Clean
Once the pre-treatment solution has had time to work, it’s time to scrub the affected area. Take your scrub brush for larger surfaces or an old toothbrush for smaller, detailed spots, and carefully begin scrubbing the mold. Focus on removing all visible traces of mold, but be mindful not to scrub too hard, as this could damage the surface of the window or surrounding materials. Depending on how severe the mold growth is, you may need to spend extra time on stubborn spots. Be thorough in your cleaning, as any mold left behind can lead to regrowth. This step requires patience and attention to detail, but the effort will pay off with a mold-free surface.
6. Rinse and Dry
After scrubbing away the mold, it’s essential to rinse the area thoroughly to remove any remaining residue from the cleaning solution. Use a damp cloth or sponge soaked in warm, soapy water to wipe down the entire surface. Make sure to clean away all traces of mold and the cleaning agent, as leaving any residue behind could attract dirt or moisture. Once the area is completely clean, dry it thoroughly using a clean cloth or paper towels. Mold thrives in moist environments, so ensuring the surface is entirely dry is a critical step in preventing future mold growth. Consider leaving the window open or using a fan to promote airflow and help the area dry faster.
7. Dispose of Materials
Proper disposal of cleaning materials is the final step in preventing the spread of mold. Any disposable items such as gloves, paper towels, or old cloths used during the cleanup should be thrown away immediately in a sealed garbage bag. If you used reusable tools like scrub brushes or rags, be sure to wash them thoroughly in hot, soapy water to kill any mold spores they may have picked up. Allow these items to dry completely before storing them to ensure no moisture remains, which could lead to mold regrowth. Taking the time to properly dispose of and clean your tools will ensure that mold doesn’t spread to other areas of your home and keeps your tools safe for future use.
⚠️ Preventing Mold on Window Sills

While removing mold is essential, prevention is vital in keeping your windows mold-free in the long run. Here’s how you can prevent mold from returning to your window sills:
1. Control Humidity
Keep indoor humidity between 30–50% to prevent excess moisture, which can lead to condensation and mold growth. If certain areas, like basements or bathrooms, are prone to higher humidity, use a dehumidifier to maintain balance and keep your home comfortable.
2. Improve Ventilation
Good airflow reduces moisture buildup in your home. Open windows when weather permits, use exhaust fans in kitchens and bathrooms, and run ceiling fans to circulate air. Proper ventilation helps prevent condensation and keeps your indoor air fresh.
3. Insulate Windows
Windows that are well-insulated help maintain a stable indoor temperature and reduce condensation. If you frequently notice moisture buildup, upgrading to double- or triple-pane windows can provide better insulation and energy efficiency.
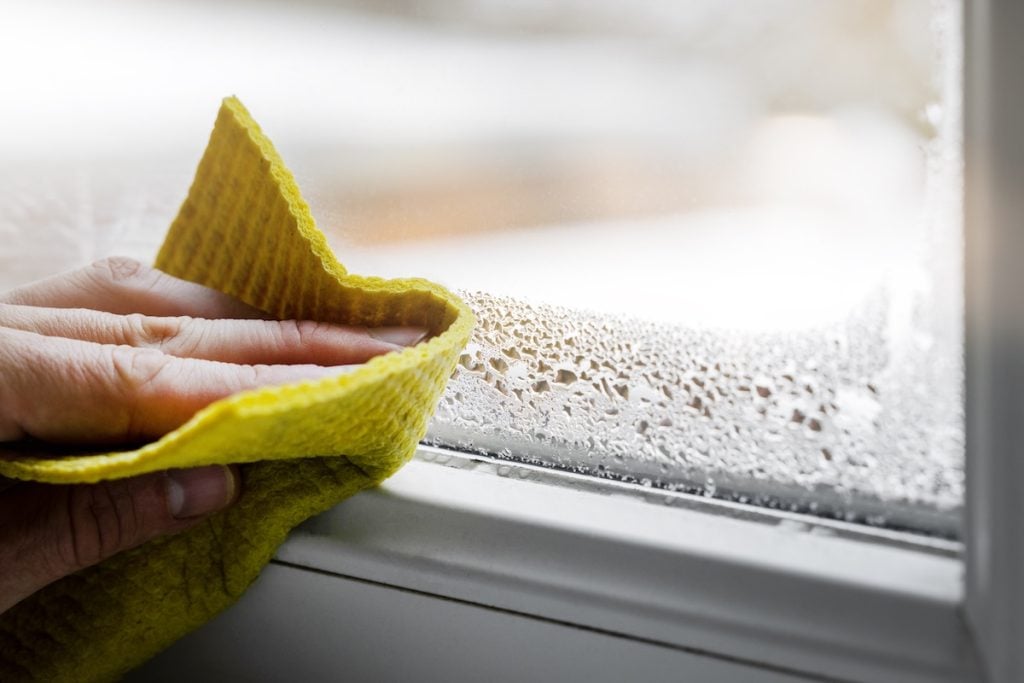
4. Wipe Condensation Regularly
Condensation on windows can lead to mold if left unchecked. During colder months, take a moment each day to wipe down windows and sills to stop moisture from accumulating and causing damage.
5. Seal Window Leaks
Cracks or gaps in window frames let moisture and cold air into your home. Inspect your windows regularly and seal any leaks with caulking or weatherstripping to keep moisture out and maintain a comfortable, dry living space.
6. Use Mold-Resistant Products
To prevent mold from forming, apply a mold-resistant sealant to window sills and other vulnerable areas. These products add an extra layer of protection, making it harder for moisture to lead to mold growth in the future.
🏠 Mold Removal Guide
At Arch Exteriors, we understand how frustrating and concerning mold on your window sills can be. That’s why we’re committed to providing expert solutions to keep your windows functional, beautiful, and mold-free. With our years of experience, skilled craftsmanship, and dedication to customer satisfaction, you can trust our team to address the issue quickly and effectively.
Don’t let mold compromise your home—contact Arch Exteriors today for a consultation and let us help you restore your windows to their best condition. Call now or visit our website to get started!


