How To Tarp A Roof? (With Pictures)
A damaged roof is a homeowner’s nightmare. Whether it’s from a storm, heavy winds, or wear and tear, you need a quick, temporary fix until professional repairs can be made. That’s where tarping comes in. Learning how to tarp a roof can protect your home from further water damage, debris, and other issues. This guide will walk you through:
- Why and when you might need to tarp a roof
- Tools and materials required
- Detailed steps on how to tarp a roof
- Safety precautions to keep in mind
🏚️ Why Would You Need to Tarp a Roof?
Using a roof tarp is a temporary measure to protect your home from leaks, pests, and debris. Here are some common situations when tarping is necessary:
- Storm Damage: Shingles might blow off or tree branches could puncture the roof.
- Active Leaks: Tarping can provide a quick solution to prevent further water intrusion.
- Preventive Measures: If you spot signs of potential issues, tarping can protect your home until repairs are completed.
Tarping is not a permanent fix but plays a critical role in reducing further damage to your home until your roof is repaired or replaced.
🧰 Tools and Materials You’ll Need
Before starting, make sure you have these essentials ready for the job:
- Heavy-duty, waterproof tarp (preferably large enough to cover the damaged area)
- Roofing nails or screws
- A hammer or cordless drill
- 2×4 wooden planks
- Utility knife
- Work gloves
- Roofing ladder or extension ladder
- Safety harness (optional but highly recommended)
Now that you have everything ready, it’s time to get to work.
🛠️ How to Tarp a Roof in 6 Steps
Follow these steps carefully to ensure your tarp is securely installed and efficient at protecting your home.
1. Assess the Damage
Assessing the damage is a crucial step in the process of tarping a roof as it allows you to evaluate the extent of the issues without immediately resorting to risky maneuvers such as climbing onto the roof. By inspecting the damage from the ground or attic, you can safely identify missing shingles, punctures, or damaged flashing. This preliminary examination helps you estimate the amount of material required for the tarping job, ensuring you are well-prepared. Additionally, assessing the damage ensures that you proceed under safe weather conditions, minimizing potential hazards during the repair process.
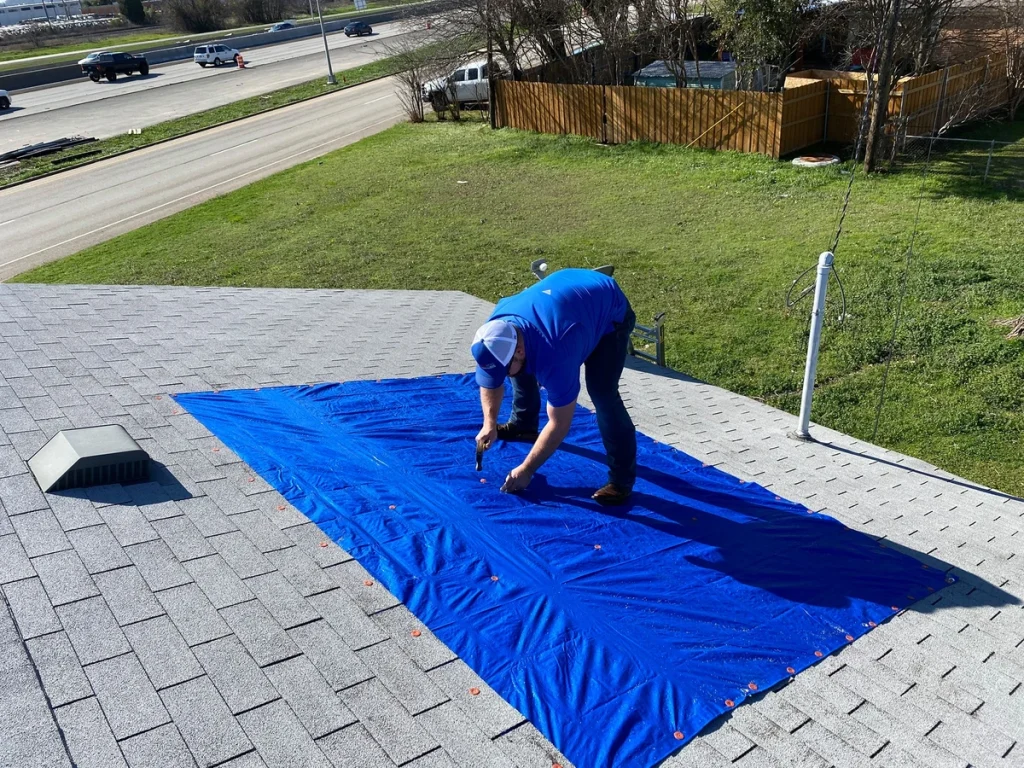
2. Prepare Your Materials
Preparing your materials is a crucial step in tarping a roof as it ensures efficiency and safety during the process. By gathering all your materials and tools in one secure location, you minimize the risk of losing essential items and streamline the workflow. Cutting the tarp to the appropriate size, while leaving at least 4 feet of overhang on all sides, is vital for stability and effective coverage. Pre-cutting your 2×4 planks to secure the tarp edges to the roof further enhances the structural integrity and durability of the tarping, safeguarding your home from potential weather damage.
3. Set Up Your Ladder and Safety Gear
Setting up your ladder and safety gear is a crucial step when tarping a roof because it ensures your safety and stability during the process. Prioritizing safety involves making sure the ladder is stable and correctly positioned to prevent accidents. Wearing non-slip shoes and a tool belt helps keep your hands free and provides better mobilization, while using a safety harness is particularly important on steep or significantly damaged roofs, as it adds an extra layer of protection against falls. Taking these precautions significantly reduces the risk of injury, allowing you to focus on effectively tarping the roof.
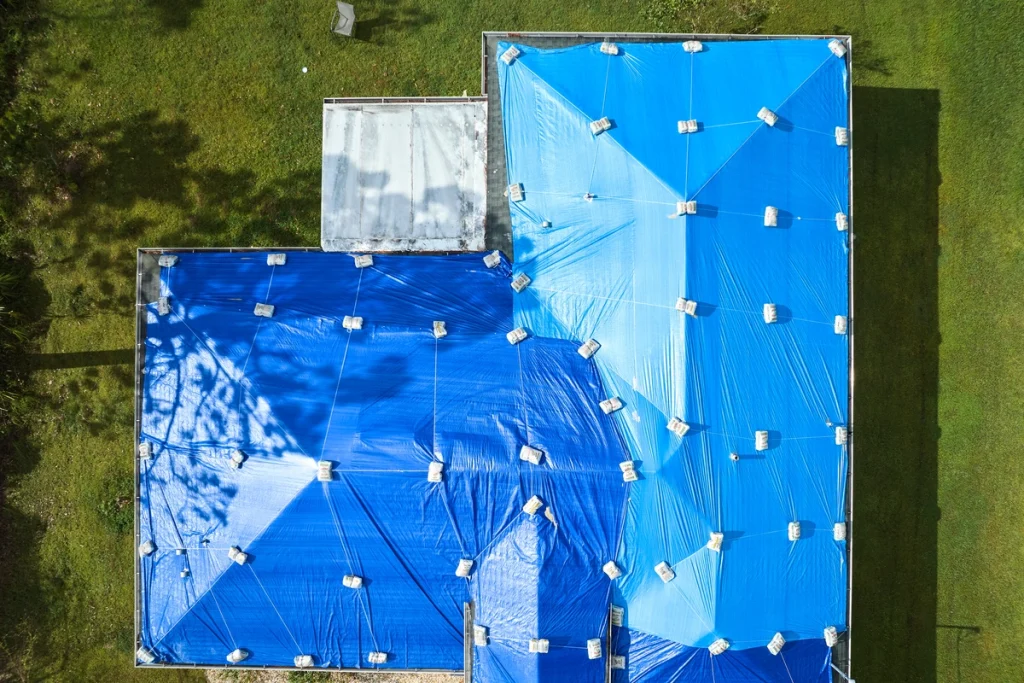
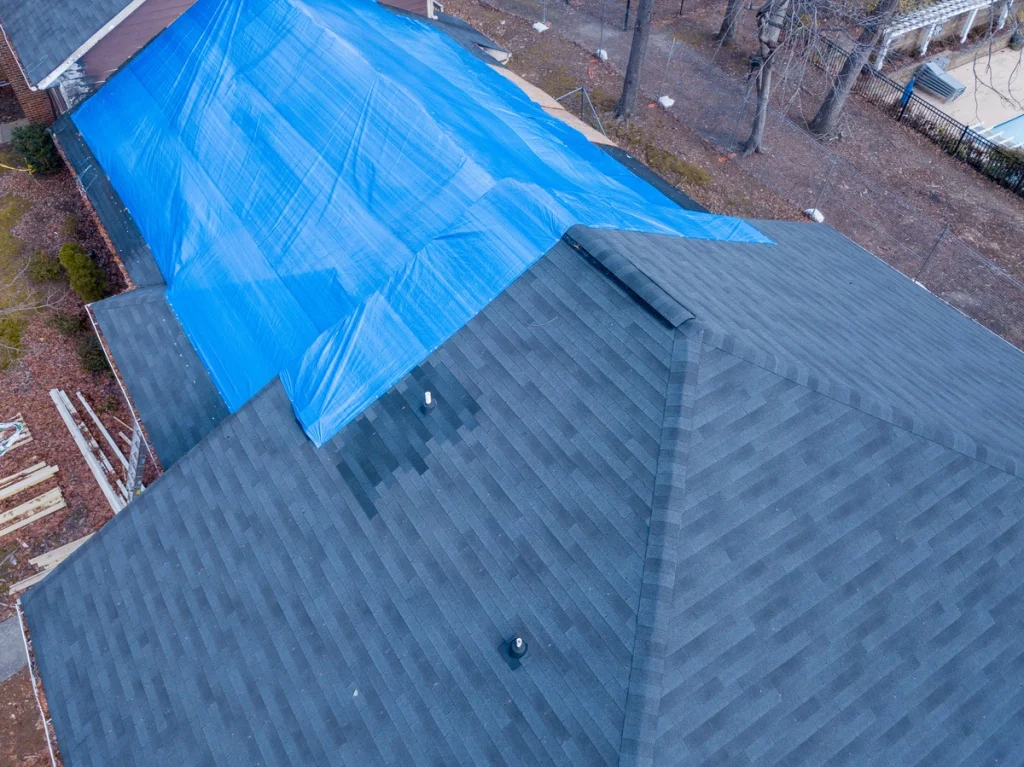
4. Cover the Roof With the Tarp
Covering the roof with the tarp is a crucial step in effectively tarping a roof, as it ensures the damaged area is adequately protected from further weather-related deterioration. By carefully draping the tarp over the affected sections and aligning it to fully cover all holes or exposed areas, you create a barrier against rain and debris. The additional overhang, which extends beyond the roof’s edges, is essential for directing water away from vulnerable sections, preventing leaks and potential interior damage. This precautionary measure is vital for safeguarding the integrity of the structure until permanent repairs can be made.
5. Secure the Tarp
Securing the tarp is a crucial step in tarping a roof as it ensures the protection and stability of the temporary cover. By using roofing nails or screws, the tarp is firmly attached to the roof edges, which is vital for keeping the tarp in place during adverse weather conditions. To enhance stability, nails or screws should be placed along the edges in a straight line at 6–12-inch intervals, taking care not to damage unaffected parts of the roof.
Additionally, reinforcing the tarp with 2×4 wooden planks along the edges or over foldable sections adds an extra layer of security. By hammering these planks in place, the tarp is further anchored, preventing it from shifting or blowing away, which is essential to maintain the integrity of the roof’s coverage until permanent repairs can be made.
6. Double-Check Security
Double-checking security is a crucial step when tarping a roof to ensure it is properly protected from the elements. It is important to make sure the tarp is taut and that no areas are left exposed, as this can lead to leaks and further damage. Inspecting all nails, screws, and planks for proper placement is essential to prevent the tarp from becoming loose or dislodged. If there is any uncertainty about the security of the tarp, seeking assistance from a professional roofer is advised to guarantee that the roof is adequately safeguarded.
🦺 Precautions and Safety Tips for Tarping a Roof
Tarping a roof is a practical solution for temporary protection, but it’s important to be aware of the risks involved. Here are some essential safety tips to ensure you’re well-prepared:
Weather Conditions: Always check the weather forecast before starting the task. It’s crucial to only tarp your roof when the weather is stable. High winds or thunderstorms can pose significant risks, making the process dangerous and less effective.
Use of Ladders: Safety when using a ladder cannot be overstressed. Always have a reliable spotter present to stabilize the ladder and assist in case of any mishap. Ensure the ladder is placed on a level surface and locked securely.
Roof Stability: Avoid stepping on any parts of the roof that appear unstable or damaged. These areas may not support your weight and could lead to falls or further damage. Always test the stability of the area before committing your weight.
Emergency Preparedness: Keep a phone within reach in case of emergencies. Having a way to call for help quickly can be vital if an incident occurs.
Attire and Equipment: Wear appropriate clothing, such as non-slip shoes and a safety harness, if available. Proper attire can provide additional safety and comfort while working.
Professional Help: While DIY tarping can be a time-saving and cost-effective solution, recognize your limits. If the task seems too risky or beyond your skills, don’t hesitate to contact a professional. They are equipped with the experience and tools to handle such tasks safely.
By following these precautions and safety tips, you can minimize risks and effectively protect your home with a tarp. Safety should always be your top priority when undertaking such projects.
🙌 Protect Your Home with Expert Roof Tarping and Repairs
Tarping a roof is a valuable skill for any homeowner facing unexpected roof damage. By following the steps outlined in this guide, you can safeguard your home temporarily until professional repairs are made. However, it’s essential to recognize the risks and complexities involved in this process. That’s where ARCH Exteriors comes in. Our team of skilled professionals is committed to providing top-tier home improvement services with safety and precision at the forefront. We understand that your home is your sanctuary, and we’re here to ensure it remains protected. If you’re ready to secure your home’s future, contact ARCH Exteriors today and let us handle the rest. Don’t wait until it’s too late—call or visit our website now to schedule your consultation.


