Composite Deck Installation: How To Do It Yourself (DIY Guide)
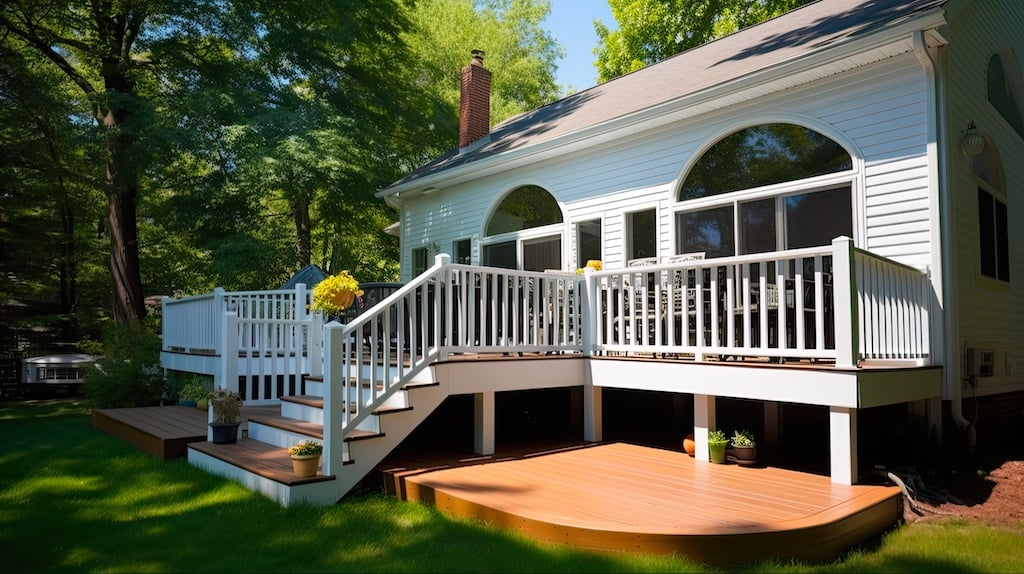
Transforming your outdoor space with a beautiful and low-maintenance composite deck is an exciting home improvement project. Whether you’re looking to expand your outdoor living area, add value to your home, or create a cozy spot for relaxation, installing composite decking can be a rewarding DIY endeavor. In this comprehensive guide, we’ll walk you through the steps on how to install composite decking and create the backyard retreat of your dreams!
Inside this blog:
- Why composite decking is a smart choice for homeowners
- A 7-step guide for successful composite decking installation
- Tips + tricks for DIY composite decking
Keep reading to become a DIY master at composite decking installation so you can boost your home’s curb appeal and scratch that DIY itch!
How to Install Composite Decking: Why Choose It?
Before we dive into the installation process, let’s briefly explore why composite decking is an excellent choice for your outdoor project:
Durability
Composite decking is designed to withstand the elements, including harsh weather, UV rays, and moisture, without rotting, warping, or splintering. This means your deck will look as good as new for years, even in challenging climates.
Low Maintenance
Unlike traditional wood decking, composite boards require minimal maintenance. No need for staining, sealing, or constant upkeep. Just occasional cleaning to keep your deck looking its best.
Longevity
Composite decking has a long lifespan, often outlasting traditional wood decking, making it a cost-effective choice in the long run. You can enjoy your beautiful deck without worrying about premature replacement.
Aesthetics

Composite decking comes in a wide range of colors and styles, allowing you to achieve the look you desire for your outdoor space. Whether you prefer a classic wood-grain appearance or a modern, sleek design, there’s a composite decking option to suit your aesthetic preferences. Your deck can be a true reflection of your style.
Now, let’s get started on the installation process.
Materials and Tools You’ll Need 🧰
Before you begin, gather the necessary materials and tools for your composite decking project. Here’s a list to help you get started:
- Composite decking boards & deck screws
- Joists or sleepers (preferably pressure-treated wood) & end caps or trim pieces
- Gravel or landscape fabric (for ground-level decks)
- Post anchors & concrete or adjustable deck blocks (for elevated decks)
- Post sleeves (for railing installation)
- Drill/driver with screwdriver bits & a circular saw with a fine-toothed blade
- Carpenter’s square, chalk line, & level
- Safety glasses, ear protection, & work gloves
- Spacing guides (or spare deck boards for spacing)
- Rubber mallet & measuring tape
How To Install Composite Decking in 9 Simple Steps
Below we’ll cover the 7 essential steps to ensuring a successful DIY composite decking installation.
1. Plan Your Deck
- Design: Decide on the size, shape, and layout of your deck. Consider any features like stairs, railings, or built-in benches to optimize your deck layout.
- Permits: Check with your local authorities if permits are required for your deck project.
2. Prepare the Site
- Clear the Area: Remove grass, weeds, or any obstacles from the area where your deck will be built.
- Level the Ground: Ensure the ground is level and compacted. You may need to use a tamper for this.
3. Install the Frame
- Set the Joists: Place joists or sleepers on the ground or on top of deck blocks or concrete supports for elevated decks. Ensure they are spaced according to your composite decking manufacturer’s guidelines.
- Use Joist Tape: Apply joist tape to the tops of the joists to prevent moisture penetration.
4. Create the Decking Substructure

- Install Deck Boards: Begin installing your composite deck boards perpendicular to the joists. Leave a small gap between each board for expansion and drainage.
- If using grooved composite deck boards, ensure compatibility with hidden clip fasteners for a seamless appearance.
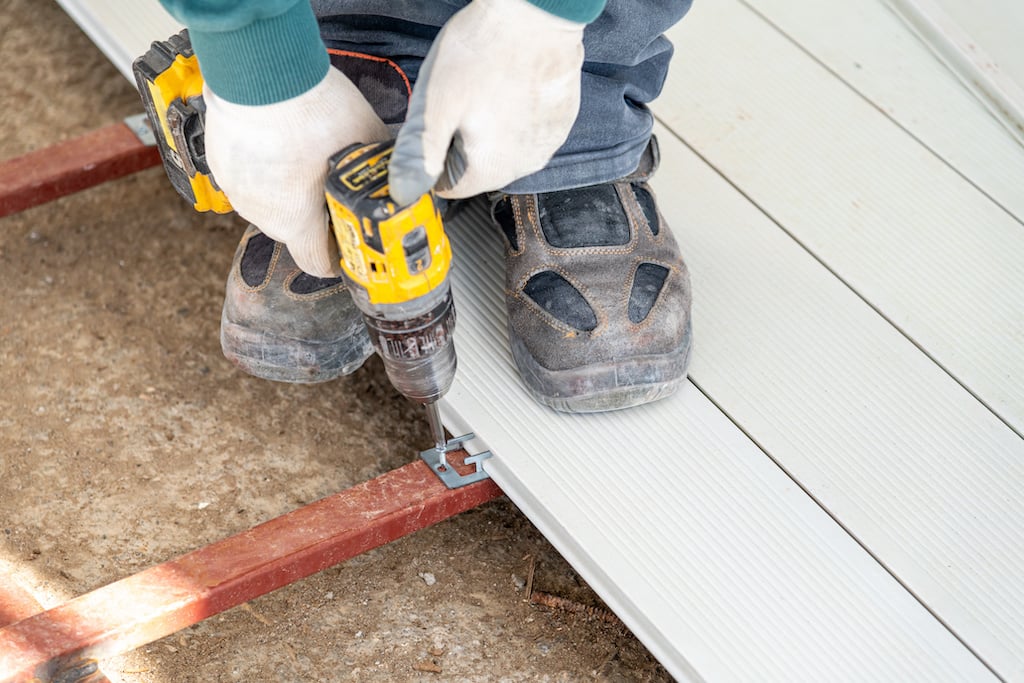
- Secure the Boards: Use composite deck screws to secure the boards to the joists. Pre-drill holes for a clean and secure fit.
- Check for Level: Use a level to ensure your deck boards are even and level as you progress.
5. Install Composite Deck Boards
Installing composite deck boards is a crucial step in the decking installation process. To ensure a successful installation, follow these steps:
- Start with the First Deck Board: Begin by installing the first deck board, making sure it is properly aligned with the joists. This initial alignment is critical for the overall look and stability of your deck.
- Use Hidden Fasteners: Secure the deck board to the joists using hidden fasteners, spacing them 16 inches on center. Hidden fasteners provide a seamless, cleaner look and help prevent any visible screws or nails.
- Continue Installing Composite Deck Boards: As you proceed, overlap each board by 1/4 inch to create a seamless joint. This overlap ensures a tight fit and helps with water drainage.
- Mark with a Chalk Line: Use a chalk line to mark the location of the next deck board, ensuring it is properly aligned with the previous board. This step helps maintain consistent spacing and alignment.
- Cut to Length with a Circular Saw: Use a circular saw to cut the deck boards to the required length, taking care to avoid damaging the surrounding boards. A fine-toothed blade will provide a clean cut.
- Stagger the Boards: Install the deck boards in a staggered pattern to create a strong and stable deck. This pattern not only adds visual interest but also enhances the structural integrity of the deck.
By following these steps, you’ll ensure that your composite deck boards are properly installed, creating a beautiful and durable outdoor space.
6. Secure Deck Boards
Securing deck boards is essential to ensure the stability and longevity of your deck. To secure deck boards, follow these steps:
- Use Hidden Fasteners: Secure the deck boards to the joists using hidden fasteners, spacing them 16 inches on center. Hidden fasteners provide a sleek, nail-free surface and help maintain the deck’s aesthetic appeal.
- Properly Seat the Fasteners: Make sure the fasteners are properly seated in the deck board, avoiding any gaps or unevenness. This ensures a secure fit and prevents movement.
- Screw the Fasteners into Place: Use a drill to screw the fasteners into place, taking care not to overtighten. Overtightening can damage the boards and compromise their integrity.
- Regularly Check for Security: Check the deck boards regularly to ensure they are properly secured and not loose. This ongoing maintenance helps prevent any potential safety hazards.
- Ensure Level Alignment: Use a level to ensure the deck boards are properly aligned and level. This step is crucial for both the appearance and functionality of your deck.
By taking the time to securely fasten your deck boards, you’ll create a stable and long-lasting deck that you can enjoy for years to come.
7. Trim and Finish
- Trim the Edges: If needed, trim the outer edges of your deck boards to achieve a clean, finished look.
- Install End Caps: Apply end caps or trim pieces to cover the ends of your composite deck boards.
8. Railing Installation (Optional)
- Install Posts: Attach post anchors to your deck surface, then slide post sleeves over them.
- Attach Rails: Install deck railings and other railing components, following your manufacturer’s instructions. Be sure to check for plumb and level.
9. Final Inspection
- Inspect and Enjoy: Give your deck a final inspection to ensure everything is secure and level. Now, it’s time to relax and enjoy your new outdoor space!
Tips for a Successful Composite Decking Installation 🔧
To ensure a smooth and successful installation, consider these tips:
Follow specific installation tips to streamline the process and avoid common pitfalls. Use the correct method for installing hidden fasteners to ensure proper alignment and secure attachment of decking boards. Opt for decking systems that offer easy installation, such as those using CONCEALoc hidden clip fasteners, which eliminate the need for pre-drilling and simplify the securing of deck boards.
Follow Manufacturer Guidelines
Always follow the installation instructions provided by your composite decking manufacturer. They may have specific recommendations for their products.
Allow for Expansion
Leave adequate gaps between boards to accommodate expansion and contraction due to temperature changes.
Use the Right Fasteners
- Inspect and Enjoy: Give your deck a final inspection to ensure everything is secure and level. Now, it’s time to relax and enjoy your new outdoor space!
Tips for a Successful Composite Decking Installation 🔧
To ensure a smooth and successful installation, consider these tips:
Follow Manufacturer Guidelines
Always follow the installation instructions provided by your composite decking manufacturer. They may have specific recommendations for their products.
Allow for Expansion
Leave adequate gaps between boards to accommodate expansion and contraction due to temperature changes.
Use the Right Fasteners
Use composite deck screws designed for your specific decking material. Avoid using regular wood screws, as they may not provide the necessary grip.
Maintain Consistency
Maintain consistent spacing and alignment throughout the installation to achieve a polished look.
Safety First
Use appropriate safety gear when cutting composite boards, and follow safety guidelines for all tools.
Consider Hidden Fasteners
If you prefer a seamless deck surface, consider using hidden fasteners or deck clips for a clean finish.
Common Mistakes to Avoid
When installing composite decking, there are several common mistakes to avoid. These include:
- Improperly Installed Hidden Fasteners: Improperly installed hidden fasteners can lead to loose deck boards and safety hazards. Ensure that fasteners are correctly seated and securely fastened.
- Inadequate Spacing Between Deck Boards: Inadequate spacing between deck boards can lead to water damage and rot. Always leave adequate gaps to accommodate expansion and drainage.
- Failure to Secure Deck Boards to Joists: Failure to properly secure the deck boards to the joists can lead to instability and collapse. Use the correct fasteners and ensure they are tightly secured.
- Using the Wrong Type of Fasteners or Screws: Using the wrong type of fasteners or screws can damage the deck boards or compromise their integrity. Always use fasteners recommended by the manufacturer.
- Not Following Manufacturer’s Instructions: Not following the manufacturer’s instructions for installation can void the warranty and lead to safety hazards. Always adhere to the guidelines provided.
By avoiding these common mistakes, you can ensure a successful and safe composite decking installation, resulting in a beautiful and durable outdoor space.
Install Composite Decking Like a Pro 🏡
Installing composite decking is a rewarding DIY project that can enhance your outdoor living space for years to come. With durability, less maintenance, and a wide range of style options, composite decking is an excellent choice for homeowners looking to create a beautiful and functional outdoor retreat. By following the steps outlined in this guide and adhering to safety precautions, you can complete your composite decking project with confidence. So, gather your materials and tools, plan your design, and get ready to enjoy your newly transformed outdoor oasis!
Contact Arch Exteriors today to get in touch with our expert team of contractors. With our top tier craftsmanship and dedicated customer service, we guarantee you’ll be thrilled with the final product. Let’s get started on your next home improvement project today!


